
A hairline crack in your siding or a single loose panel might look like a minor cosmetic issue, but in Washington’s wet climate, that small defect is an open invitation for water to get behind your exterior and rot the structural sheathing underneath. We’ve seen homeowners spend thousands of dollars on mold remediation and structural repairs that started as a gap you could barely see. Even small gaps can allow moisture to penetrate and cause hidden rot and mold. This guide walks you through everything you need to know, from identifying damage and gathering supplies to executing repairs on wood, vinyl, and fiber-cement siding, so you can stop small problems before they become serious ones.
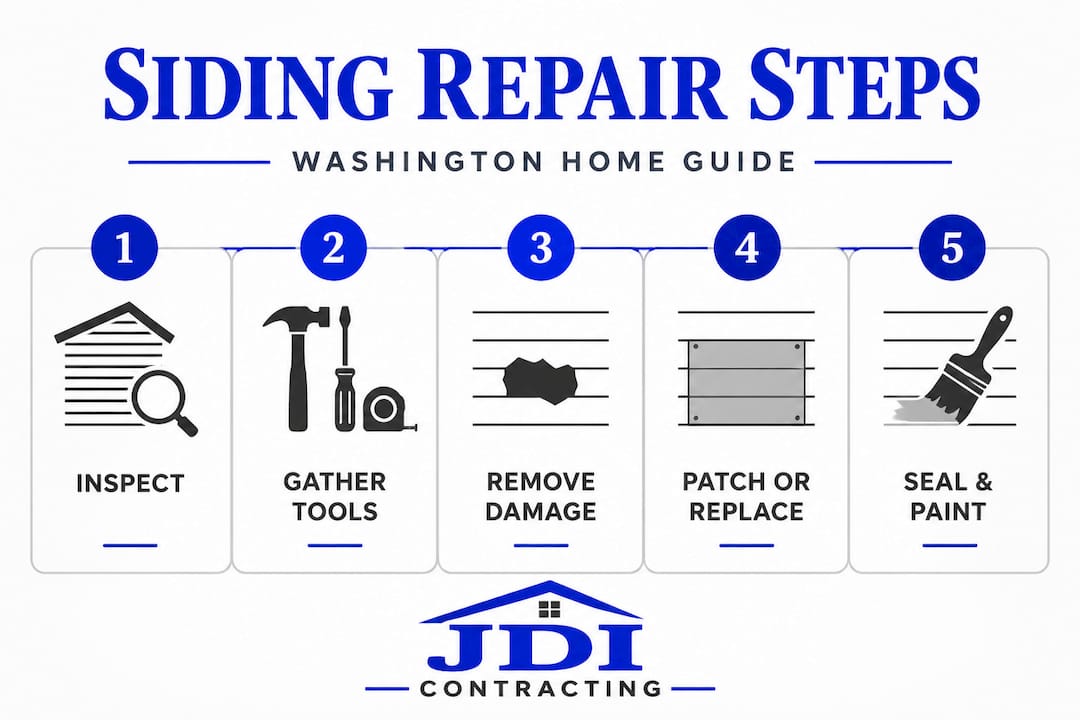
Comprehensive Guide to Siding Repair
- Know your enemy: How siding fails in Washington’s climate
- Gather your tools and supplies
- Step-by-step: Repairing wood, vinyl, and fiber-cement siding
- Troubleshooting and mistakes to avoid
- What to expect: Cost, outcomes, and when to upgrade
- What most siding repair guides miss: Fixing for the long haul
- Expert repairs and upgrades for lasting protection
- Frequently asked questions
Key Takeaways
| Point | Details |
|---|---|
| Water damage risk | Ignoring small siding issues in Washington can lead to serious moisture damage and expensive repairs. |
| Material-specific repairs | The right repair method depends on your siding type—wood, vinyl, or fiber-cement—all require different tools and materials. |
| DIY vs. pro decision | Tackle small, localized repairs, but call a pro if the damage is widespread, warped, or compromises underlying walls. |
| Inspection is essential | Always inspect seams, windows, and behind damaged areas to catch hidden problems caused by the damp Pacific Northwest climate. |
| Budget for costs | Expect to spend between $842 and $2,969 for typical repairs in the Seattle region, with full replacement costing more. |
Know your enemy: How siding fails in Washington’s climate
Washington’s weather is genuinely tough on siding. Western Washington gets relentless rain from October through April, while Spokane deals with freeze-thaw cycles that crack and warp materials that were perfectly fine the previous summer. Understanding what you’re up against helps you make smarter repair decisions before you pick up a single tool.
Common siding failure modes include:
- Warping and cupping caused by repeated moisture absorption and drying
- Rot in wood and engineered wood products, especially near the ground or at butt joints
- Cracks and chips from impact, thermal expansion, or age
- Loose or popped panels from fastener failure
- Insect damage, particularly from carpenter ants in moist areas
- Paint bubbling, which is often your first visible warning of moisture trapped beneath the surface
The tricky part is that visible damage is rarely the full picture. Moisture management failures in western Washington almost always involve hidden damage around windows, doors, and seams that you won’t see until you pull back the affected material. After any significant storm, do a full walk-around and look for bubbling paint, soft spots when you press the siding, or a musty smell near exterior walls.
Your pre-repair inspection checklist:
- Press firmly on any suspect area. Soft or spongy material means rot has already started.
- Check the caulking around every window and door frame. Cracked or missing caulk is a primary entry point for water.
- Look for gaps at seams, corners, and where siding meets trim.
- Inspect the lowest course of siding closest to the ground or deck, since these areas stay wet the longest.
- Look up at the underside of any overhangs where siding meets the soffit.
Proper maintaining siding through regular inspections twice a year, once in spring and once in fall, is the single best way to catch problems while they’re still cheap to fix.
Pro Tip: Use a flat-head screwdriver to probe suspicious areas. If it sinks into the wood with minimal pressure, you have rot that goes deeper than the surface. Plan to remove more material than you think you need to.
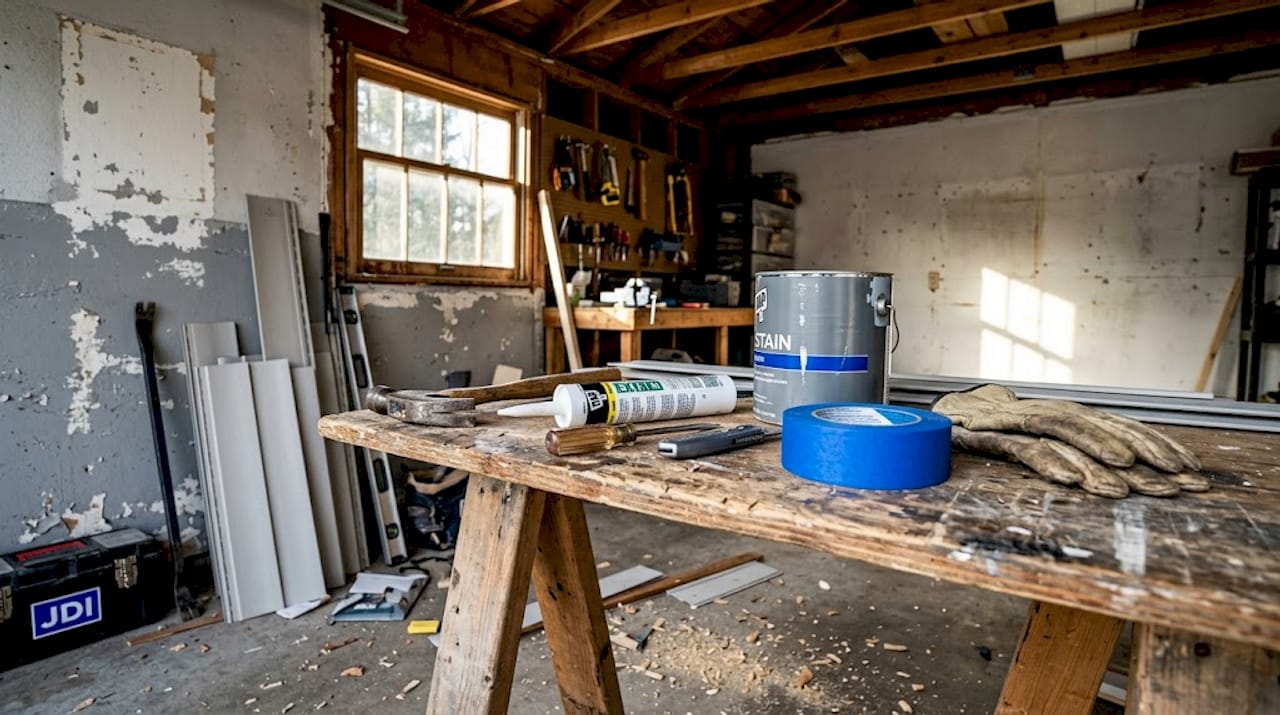
Gather your tools and supplies
Once you’ve identified the scope and type of damage, your next step is getting ready for the fix. The biggest mistake homeowners make is starting a repair and then stopping halfway through because they’re missing a key material. Getting everything together before you start saves time and keeps the repair area protected.
The right materials depend heavily on your siding type. Using the correct filler and patch material and following manufacturer instructions is essential for a durable result. Here’s a breakdown of what you’ll need:
| Siding type | Repair materials | Tools needed |
|---|---|---|
| Wood | Epoxy wood filler, exterior caulk, primer, paint | Putty knife, sandpaper (80 and 120 grit), pry bar, circular saw |
| Vinyl | Color-matched patch kit, exterior caulk, zip tool | Utility knife, zip tool, tin snips, caulk gun |
| Fiber cement | Cement-based patching compound, primer, paint | Carbide-tipped saw blade, putty knife, sanding block, caulk gun |
Universal safety gear for any siding repair:
- Safety glasses or goggles (fiber cement dust is particularly hazardous)
- N95 dust mask, especially when cutting fiber cement or disturbing old paint
- Work gloves to protect against sharp edges on vinyl and fiber cement
- Sturdy ladder with stabilizers if you’re working above the first floor
Beyond the patch materials, have your matching paint or stain ready before you start. Color matching after the fact is frustrating and often results in a visible patch. Bring a small piece of the existing siding to your paint supplier and ask for a spectrophotometer match. Also stock up on corrosion-resistant fasteners, either stainless steel or hot-dipped galvanized, since standard fasteners will rust and stain your siding within a few years in Washington’s wet environment.
Step-by-step: Repairing wood, vinyl, and fiber-cement siding
Tools in hand, you’re ready to address the damaged siding. The first decision you need to make is whether to patch or replace. Here’s a simple rule: patch when the damage is small and localized, replace when the damage covers more than about one-third of a board or panel, or when the material beneath is compromised.
| Siding type | Patch when… | Replace when… |
|---|---|---|
| Wood | Crack or hole is smaller than a golf ball, no rot | Rot present, board is warped or split along its length |
| Vinyl | Nail-sized puncture or small crack | Panel is cracked across its width or buckled |
| Fiber cement | Surface chip or hairline crack | Board is cracked through or delaminating |
Repairing wood siding:
- Use a pry bar and hammer to carefully remove any loose or cracked material around the damaged area.
- Probe the exposed area and surrounding wood for rot. Remove all rotted material and inspect the sheathing underneath before moving forward.
- If the sheathing is sound, apply a two-part epoxy wood filler according to the manufacturer’s instructions. Pack it slightly proud of the surface.
- Let it cure fully, then sand flush with 80-grit paper followed by 120-grit for a smooth finish.
- Apply a coat of exterior primer, let it dry, then paint to match.
- Caulk all edges where the repair meets existing siding or trim.
Repairing vinyl siding:
- Use a zip tool (a J-channel unlocking tool) to release the panel above the damaged one, which gives you access to the nailing hem.
- For small punctures or cracks, apply color-matched exterior caulk and smooth it flush. This works well for nail-sized holes.
- For larger damage, cut out the damaged section using tin snips. Cut a replacement piece from a matching panel, leaving a couple of inches of overlap on each side.
- Slide the replacement piece into place, secure the nailing hem, and lock the panel above back into position using the zip tool.
- Caulk any exposed seams at the cut edges.
Repairing fiber-cement siding:
- Clean the damaged area thoroughly and remove any loose chips or crumbling material.
- For minor chips or cracks, apply a cement-based patching product designed for fiber cement. Smooth it flush and feather the edges.
- For full board replacement, score and snap the board or cut with a carbide-tipped blade while wearing your N95 mask. Fiber cement dust is silica-based and genuinely hazardous.
- Nail the new board in place with corrosion-resistant fasteners, prime all edges before installation (this is critical for fiber cement), and paint to match.
Pro Tip: Check out a real-life siding renovation to see how professional repairs look when they’re done right. Seeing the before-and-after difference can help you set realistic expectations for your own project.
Troubleshooting and mistakes to avoid
With the repairs done, evaluating your work and knowing the red flags ensures your siding stands up to the next storm. Even experienced DIYers run into problems, and knowing what to look for saves you from repeating the same repair six months later.
The most common siding repair mistakes:
- Sealing over rot or moisture without removing it first. This is the number one cause of repeat failures.
- Using interior caulk or the wrong patch material outdoors. It will fail within one season.
- Skipping primer before painting. Paint without primer peels quickly, especially on wood and fiber cement.
- Poor color matching that makes the repair more visible than the original damage.
- Nailing fiber cement or vinyl too tightly, which prevents the natural expansion and contraction that these materials need.
“If the repair is only a small, localized defect, patching and spot sealing can work; but if the siding is loose or warped or there are signs of underlying sheathing damage, the scope likely grows and may be better handled professionally.” Angi siding repair guide
Watch for repeating problems after your repair. If the paint bubbles again within a few months, moisture is still getting in somewhere. If a board stays soft or a seam keeps opening up, the underlying issue wasn’t fully resolved. These are signs that the damage was more extensive than it appeared, and that professional assessment is the smart next step.
When it comes to enhancing curb appeal, a well-executed repair that blends seamlessly is just as valuable as a full replacement. But only if the root cause is actually fixed.
What to expect: Cost, outcomes, and when to upgrade
Knowing what a good repair looks like and how much you might spend helps you plan ahead or decide if it’s time for bigger changes.
Regional cost benchmarks:
| Repair scenario | Estimated cost |
|---|---|
| Seattle area siding repair (typical range) | $842 to $2,969 |
| Seattle area average repair cost | ~$1,870 |
| Spokane siding replacement (per sq. ft. installed) | $7.50 to $13.50 |
These numbers reflect professional labor and materials. A DIY repair on a small area can cost as little as $50 to $150 in materials if you already own the basic tools. The savings are real, but only if the repair is done correctly the first time.
Signs your repair was successful:
- The patched area is visually flush with the surrounding siding
- No soft spots remain when you press on the repair
- Caulk lines are smooth and fully adhered with no gaps
- Paint has cured to a hard finish and color matches well
- After the first heavy rain, no water appears behind the siding or inside the wall
When upgrading makes more sense than repairing:
If more than 15 to 20 percent of your siding shows significant damage, or if the sheathing beneath is compromised in multiple areas, a full replacement often costs less in the long run than repeated spot repairs. Protecting your exterior as a complete system, including roofing, siding, and trim, is the most cost-effective approach over a 10 to 20 year horizon. Routine inspections twice a year, combined with prompt small repairs, are what keep replacement costs from arriving ahead of schedule.
What most siding repair guides miss: Fixing for the long haul
After 25 years of working on homes across Spokane and western Washington, we’ve noticed something consistent: most siding repair failures aren’t caused by poor workmanship. They’re caused by treating the repair as a cosmetic fix rather than a weatherproofing job.
A patch that looks perfect on day one can fail completely by the following spring if the material system doesn’t match. Matching the siding material and finish, including primer and paint type, to the existing system is what preserves the weather seal, not just the appearance. Using a latex caulk on a fiber-cement repair that was originally sealed with a paintable silicone, for example, creates a bond failure point that water will find immediately.
The other thing guides skip over is timing. Washington’s climate means you often want to get repairs done quickly before the next rain. But rushing the curing time on epoxy fillers, cement patches, or exterior paint is exactly how you end up redoing the same repair. Most exterior paints need at least 24 hours at temperatures above 50 degrees Fahrenheit to cure properly. If you paint on a cool October afternoon in Spokane and the temperature drops overnight, that paint film is compromised before it’s even finished drying.
Our honest advice: always go back and inspect your repair after the first significant rainstorm. Walk the perimeter, press on the patched areas, check the caulk lines, and look inside the wall cavity if you have access. That first real-world test tells you more than any visual inspection on a dry day. If something moved or a seam opened up, you’ll catch it while it’s still a small fix rather than a structural problem.
Investing in quality siding system upgrades when the time is right, rather than patching indefinitely, is often the decision that saves homeowners the most money over a decade.
Expert repairs and upgrades for lasting protection
If you want extra peace of mind or are planning a full exterior upgrade, here’s how professional support can help.
At JDI Contracting, we’ve spent over 25 years repairing and replacing siding on homes across Spokane and into Snohomish and Skagit counties. When repairs are too extensive or your schedule doesn’t allow for a multi-day DIY project, our team handles everything from single-board replacements to full exterior overhauls.

Browse our recent siding renovation results to see real before-and-after transformations on homes similar to yours. If you’re thinking about combining your repair with a full exterior refresh, our exterior renovation ideas guide covers practical ways to boost curb appeal while you’re already working on the siding. And when you’re ready to talk specifics, our professional siding installation team is available for quotes by phone or email with no pressure and no obligation.
Frequently asked questions
What is the most common cause of siding damage in Spokane?
Water intrusion from heavy rains and storms is the leading cause, often revealing itself as rot, mold, or loose boards. Even small gaps in siding allow moisture to penetrate and cause hidden damage behind the surface.
How do I know if I need to replace siding instead of just patching it?
If the siding has widespread rot, warping, or damage to the sheathing beneath, replacement is usually needed. Patching works only for small, isolated spots where the surrounding material is still structurally sound.
Can I paint over patched siding?
Yes, but only after sanding, priming, and letting the patch material cure fully. Removing failed material and sanding smooth before painting is what gives you a durable, color-matched finish that holds up through Washington winters.
What’s the average cost to repair siding around Seattle?
Typical repair costs range between $842 and $2,969, with an average around $1,870. The final cost depends on the material type, extent of damage, and how accessible the affected area is for the repair crew.
Recommended
- Siding Installation – JDI Contracting Group | General Contractor
- Maximizing Curb Appeal: Exterior Renovation Ideas for Your Home – JDI Contracting Group | General Contractor
- Home – JDI Contracting Group | General Contractor
- Portfolio project: “Siding Renovation” – JDI Contracting Group | General Contractor